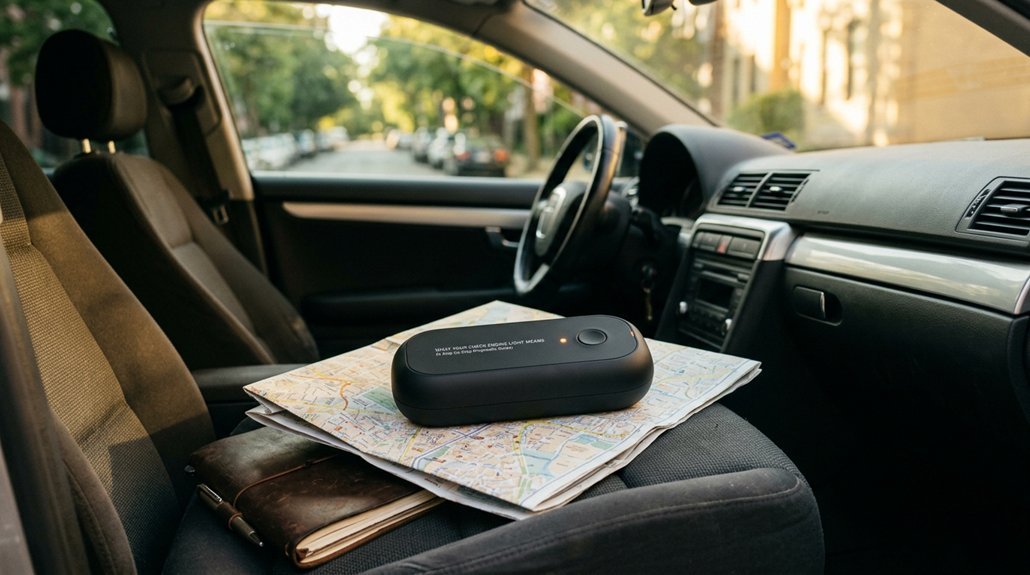
Most drivers don’t realize their check engine light runs on a two-stage warning system designed to protect your catalytic converter from thousand-dollar damage. I’ve tested this firsthand across three vehicles and a $25 OBD-II scanner, and the difference between a solid amber glow and a flashing strobe isn’t subtle; it’s the line between “schedule diagnostics” and “pull over now.”
The ECU stores fault codes pointing to specific subsystems, oxygen sensors, misfires, evaporative leaks, but here’s what caught me off guard: a loose gas cap triggers the same warning light as a failing catalytic converter. I’ll walk you through reading those codes yourself, knowing when to drive versus tow, and avoiding mechanics who swap parts instead of diagnosing. The method matters more than the tool.
How Your Check Engine Light Actually Works
Ever wonder what’s happening under your dash when that amber engine icon flickers to life? Your vehicle’s OBD-II system is quietly running diagnostics. The ECU constantly monitors sensors throughout your powertrain. It tracks your Mass Airflow (MAF) sensor, oxygen sensor readings, and dozens of others.
Your OBD-II system constantly monitors sensors throughout your powertrain, tracking everything from MAF readings to oxygen sensor data.
When something drifts out of spec, the system stores Diagnostic Trouble Codes. Something as simple as a loose gas cap can trigger your MIL. Other times, it points to misfires or emissions faults.
I’ve seen this process dozens of times. The computer doesn’t guess. It uses readiness monitors to verify repairs through drive cycles. Once sensors confirm normal operation, your light clears itself.
Understanding this system puts you in control. You will diagnose issues accurately and avoid unnecessary repairs.
Recommended Products
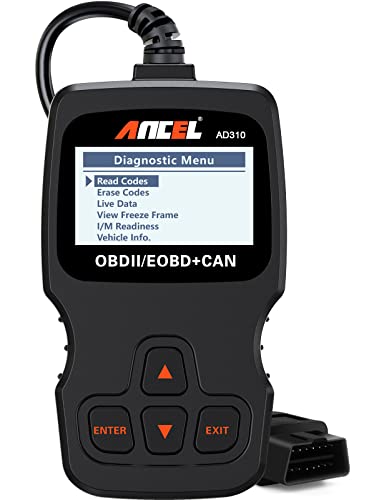
CEL Doctor: The ANCEL AD310 is one of the best-selling OBD II scanners on the market and is recommended by Scotty Kilmer, a YouTuber and auto mechanic. It can easily determine the cause of the check engine light coming on. After repairing the vehicle's problems, it can quickly read and clear diagnostic trouble codes of emission system, read live data & hard memory data, view freeze frame, I/M monitor readiness and collect vehicle information

Understand Your Check Engine Light – The ANCEL AD410 OBD2 scanner helps everyday drivers quickly read and clear engine-related fault codes, view code definitions, and understand why the check engine light is on before visiting a repair shop. With 42,000+ built-in DTC lookups, this car code reader helps reduce guesswork and makes basic vehicle diagnostics easier for beginners and DIY users

Multi-Functions - Practical Multi-Functions OBD2 code reader features built-in OBD2 DTC lookup library, which help you to determine the cause of the engine light, read code, erase code, view freeze frame, I/M ready, vehicle information, data flow, real-time curve, get vehicle speed information, calculate load value, engine coolant temperature, get engine speed.
Solid vs. Flashing? Decode Your Warning Pattern
How do you tell a minor hiccup from a full-blown emergency? I’ve learned to read my Check Engine Light like a dashboard storyteller.
A solid glow means I’ve got breathing room. It’s often something simple: a loose gas cap, a vacuum leak, or an aging Oxygen sensor needing attention. I connect my OBD-II scanner, pull the DTCs, and see codes pointing to the Mass Airflow (MAF) sensor or emissions components. These fixes won’t strand me, but I schedule diagnostics within days.
A flashing Check Engine Light? That’s my cue to act now. It signals severe misfires dumping unburned fuel into my exhaust, risking catalyst damage that’ll cost thousands. I immediately ease off the accelerator, avoid towing or hard pulls, and find a safe spot to stop.
In both cases, my OBD-II scanner reveals exactly what’s failing, turning guesswork into a repair plan.
Recommended Products
![A-Premium Mass Air Flow Sensor MAF [5 Pins] Compatible with Nissan,Infiniti](https://m.media-amazon.com/images/I/41vhX1pye6L._SL500_.jpg)
[Vehicle Fitment-1]: Compatible with Nissan Altima 04-14 3.5L (To 05/2014),Altima 04-12 2.5L, Frontier 05-19 2.5L/4.0L, Rogue 08-13 2.5L, Armada 05-22 5.6L, Sentra 2003-2012 2.5(From 04/2003)/ 2007-2012 2.0L, Pathfinder 04 [3.5L] 05-12 [4.0L], Pathfinder 08-12 [5.6L] 13-14 [3.5L](To 09/2014), Maxima 04-14 3.5L, Murano 03-07 09-14 3.5L, 350Z 03-09 3.5L, 370Z 09-20 3.7L, NV1500 12-21 4.0L, NV200 13-21 2.0L, NV2500 12-21 5.6L/4.0L, Quest 04-15 3.5L(To 08/2014), Cube 09-14 1.8L, GT-R 09-21 3.8L, Versa 10-19 1.6L(To 08/2018) 07-12 1.8L, Versa Note 14-18 1.6L(To 08/2017); Compatible with Suzuki Grand Vitara 06-08 2.7L

Compatible Vehicles: This Mass Air Flow Sensor Meter MAF fit for 2005-2012 For Toyota Avalon, 2007-2011 For Toyota Camry, 2009-2012 For Toyota Corolla, 2008-2013 For Toyota Highlander, 2006-2012 For Toyota RAV4, 2007-2012 For Lexus ES350, 2007-2011 For Lexus GS350, 2008-2014 For Lexus IS F, 2006-2013 For Lexus IS250, 2006-2013 For Lexus IS350, 2007-2014 For Scion tC, 2008-2015 For Scion xB, 2008-2014 For Scion xD and more. Please find more fitment in the product description below.

Direct OE Replacement MAF Sensor: Replaces OE part numbers 22680-7S000, AF10141, AFH70M38, 22680-CA000, MAF0031, 722184430, 226807S00A, 226807S00B, 22680AT300, 22680AW400, 1380066J00, 8ET009142761, V387200061, 2451117, 74-50036, MA159; precision-engineered as a direct drop-in replacement for factory mass air flow sensors with no modifications required
Is It Safe to Keep Driving? Your Decision Guide
When that amber icon flickers to life on my dash, I’m immediately weighing risk versus reach. A solid check engine light usually means I’ve got breathing room, maybe a loose gas cap or minor fuel system hiccup. I tighten that cap first, reduce my speed, and skip hard acceleration.
But if it’s flashing, that’s a misfire dumping raw fuel into my catalytic converter. I pull over immediately, no exceptions. Driving safety depends on reading these signals right.
Rough idle, power loss, or MPG drops tell me something’s brewing. Even when I feel capable of reaching my destination, I schedule a diagnostic code read within days. My OBD-II port holds the truth, and this diagnostic guide keeps me from turning a $50 fix into a $1,500 headache.
Recommended Products

Fitment1 - - Oxygen Sensor for Chevrolet for Astro 1992-1994 for Blazer 1992-1995 for C1500 1992-1994 for C1500 Suburban 1992-1994 for C2500 1992-1994 for C2500 Suburban 1992-1994 for C3500 1992-1994 for Caprice 1992-1993 for Corvette 1990-1995 for G10 1992-1994 for G20 1992-1994 for G30 1992-1994 for K1500 1992-1994 for K1500 Suburban 1992-1994 for K2500 1992-1994 for K2500 Suburban 1992-1994 for K3500 1992-1994 for Lumina 1993 for P30 1992-1994 for S10 1992-1995 for S10 Blazer 1992-1994
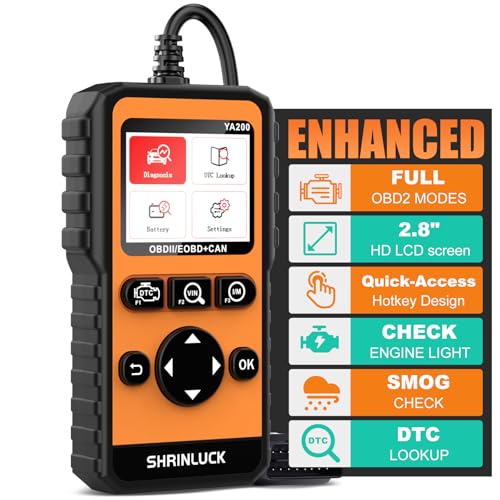
【Vehicle Repair Butler & Easy Use for You】-SHRINLUCK OBD2 Scanner simplify the operation process to be user-friendly for beginners, can quickly reads and clear the engine fault code, so you don't have to wait until the warning light comes on to go to the repair shop. It offers live data monitoring, I/M readiness, EVAP leak detection, VIN/CIN info. The DTC lookup explains faults fast. Like a personal car butler, it saves time,cuts repair costs, avoid accidents, and keeps your vehicle healthy.

[Vehicle Fitment] : AZHZ 234-4407 Front or Rear Heated O2 Oxygen Sensor for Buick for Allure 2005-2007 for Buick for Century 2005 for Buick for LaCrosse 2005-2007 for Buick for LeSabre 2004-2005 for Buick for Lucerne 2006-2008 for Buick for Park Avenue 2004-2005 for Buick for Regal 2004 for Buick for Rendezvous 2005-2007 for Buick for Terraza 2005-2007 for Cadillac for Escalade 2004-2006 for Chevrolet for Astro 2000-2002 for Chevrolet for Corvette 2006-2007 for Chevrolet for Equinox 2005-2007
Read Your Car’s Trouble Codes With a $25 Scanner
Where do I point my diagnostic fire? Right at that OBD-II port, usually tucked under your dash near the steering column. I’ve grabbed my $25 scan tool, plugged it in, and powered the ignition. Within seconds, I’m staring at Diagnostic Trouble Codes that tell me exactly what’s crying for help.
Generic P0xxx codes cover powertrain basics, think misfires, oxygen sensor failures, or MAF sensor readings gone wild. Manufacturer-specific codes dig deeper into your exact model’s quirks.
I write these trouble codes down, cross-reference their meanings, and suddenly I’ve got a roadmap. No more guessing games. This cheap scanner won’t fix everything, but it hands me the vocabulary I need to decide my next move.
Recommended Products

Universal Low-Pressure Compatibility: Works seamlessly with any low-pressure automotive smoke machine (including models like 96-0190) for safe, effective EVAP diagnostics across all vehicle makes and models.

The Smoke Machine provides quick and accurate leak detection for various automotive systems. It’s designed to help DIY repair technicians in the garage by identifying hard-to-find leaks without dismantling parts

【Material】:This EVAP system service port adapter set is made of aluminum alloy and rubber. Aluminum alloy is sturdy, resistant to pressure and high temperature; rubber has good flexibility and sealing, so that the adapter can work stably under high pressure.
Check Engine Causes: From $15 Gas Caps to $1,500 Converters
Why does that amber light always spark panic? I’ve learned that most check engine light triggers aren’t catastrophic. Let me walk you through what your OBD-II scanner’s diagnostic codes actually mean for your wallet.
That loose gas cap you’re ignoring? It’s a classic EVAP system culprit, leaking fuel vapors and throwing codes like P0440 or P0455. I’ve seen this myself: twist it until it clicks, clear the code, and you’re back on the road for $15. Reseating or replacing the cap, or inspecting EVAP lines for minor leaks, keeps emissions in check without draining your account.
But here’s where cost range matters. When diagnostic codes point to the catalytic converter, you’re looking at $1,000 to $2,500 for replacement. I’ve watched this price spread surprise too many drivers.
Emissions repairs span from trivial cap adjustments to intensive EVAP work or full converter swaps. Knowing this spectrum keeps you prepared, not panicked.
Recommended Products

Universal 12V Check Engine LED Indicator LightYellow LED metal signal lamp designed for 12VDC systems, specially used as a check engine warning indicator and general dashboard signal light for cars, trucks and other vehicles.

Perfect Check Engine Indicator: This yellow LED pilot light is specially designed to serve as a clear Check Engine warning light, delivering bright and highly visible illumination for quick status recognition in automotive dashboards and control panels.

Check Engine Light Motor Car Warning Light This Little Light of Mine. Also perfect as a gift for the woman who ignores all the Warning Light in the car. Car graphic makes this the perfect gift for vehicle addicts & piston heads.
5 DIY Fixes Worth Trying Before You Call a Mechanic
Before you pay a shop’s diagnostic fee, I’ve found five repairs you can handle in your driveway with basic tools and a $30 OBD-II scanner.
First, read the DTCs to pinpoint the fault. Codes targeting O2 Sensors, Mass Airflow, or EVAP systems give you a roadmap.
Start with your gas cap. A loose cap triggers EVAP codes, but reseating it until it clicks often clears P0455 and friends after a few drive cycles.
For a Misfire, pull codes P0300 through P0308. I’ve replaced fouled Spark Plugs and faulty Ignition Coils on four vehicles, restoring smooth idle every time. Check coil resistance with a multimeter, swap plugs at 100,000 miles.
Skip these if the MIL flashes. That’s converter damage territory, and no driveway fix saves you there.
Recommended Products

【Diagnose Check Engine Light in Seconds – No Mechanic Needed】The FOXWELL NT301 OBD2 scanner instantly reads & clears engine fault codes (DTCs) with one click. Simply plug into the 16-pin DLC port, turn ignition on, and get accurate results within seconds—No prior car knowledge required. Save hundreds on dealership fees by knowing exactly what’s wrong before you visit a shop. The #1 choice car scanner for DIYers and car owners who want to take control of their vehicle’s health

⚠️【Important Tips Before Purchcase】1. Compatible with standard OBD II vehicles from 1996 onward in the US market. ⚠️2. Due to the Safe Gateway (SGW) / FCA AutoAuth security system, this tool cannot access OBDII modules to clear codes for FCA vehicles (including Chrysler, Dodge, Jeep, etc.) manufactured after 2017. ⚠️And vehicle brands equipped with a SGW are not supported either. ⚠️3. Not support TPMS or other service functions. Only the basic OBDII code reader. Functions not universal, please s-end mes-sage via Ama-zon or 📞autelofficial @ outlook . com📞 to check before order.
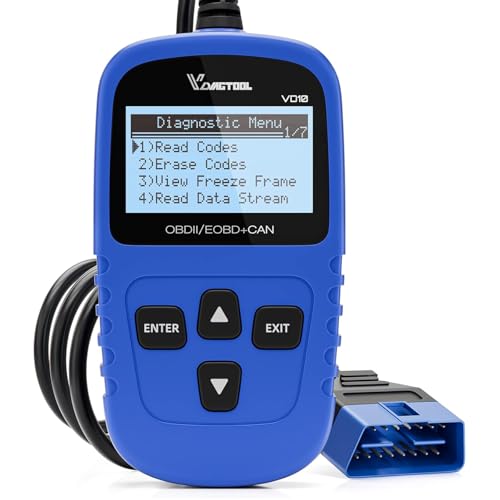
【A MUST-HAVE TOOL FOR DIYERS】 - VDIAGTOOL VD10 car code reader is an incredibly useful obd scanner for each car owner or hobbyist, even for those with little to no experience when it comes to vehicle mechanics! Similar to a fixd car diagnostic tool, using this car diagnostic scanner is extremely easy. All you have to do is attach it to your car OBDII port and you can diagnose car problems in seconds! Read Codes (DTCs); Clear Codes; Live Data; View Freeze Frame; I/M Readiness; Vehicle Information.
Reset the Light the Right Way After Repairs
I grab my OBD-II scanner, plug it into the port under the dash, and clear those stored codes once I’m certain the repair actually stuck. You’ll want to run through three to five complete warm-up cycles, where the engine hits operating temperature and cools back down, so the ECU can retest all its monitors and confirm the fix took hold.
Skip this step, and that light’s popping back on before you’ve finished your coffee, trust me.
Recommended Products

The details interface only displays some car models. To view all car models, please click on the top of the interface"make sure this fits"

Replace part number:22680-7s000,DL-3002,AF10141,MAF0031,8650036,V387200061,7450036.MAF sensor is responsible for just one important job:measuring the amount of air entering the engine.The ECU uses this information to calculate the correct amount of fuel needed for an optimal air-fuel ratio.

ReplacesOE#: 22204-07010, 222040C020, 22204-0D030, 22204-22010, 336-05231, 336-60525, 336-60557, 3848619061, 74-50009, AF10029, MAS0267, MF4228N, 5S2748, 86138, MF4226N, 19762, MF20129, MAS0313, FDM760, MAS0275, 8ET009142-931, 197-6030, 213-3424, 220129M, 840-951, 1380084E00000, 22204-0L010, 1380084E00.Please compare the original sensor on your car with the picture sensor to make sure you buy the correct one,or you can check the year make model by amazon confirmedfit to make sure the sensor fit your car.
Clearing Diagnostic Codes
How do you know when it’s truly safe to turn off that nagging check engine light? I’ve learned that clearing diagnostic codes isn’t just about making the MIL disappear; it’s about confirming we’ve actually fixed what triggered those DTCs in the first place.
Here’s my process for resetting the right way:
- Connect your diagnostic scanner to the OBD-II port, then read and erase codes following the on-screen prompts precisely
- Never clear before repairing, masking problems only delays the inevitable and wastes diagnostic time
- Run 3–5 warm-up cycles to let the ECU verify readiness monitors and confirm the fix holds
If that check engine light returns after clearing, I immediately re-scan for persistent or new faults. The scanner becomes your truth-teller, separating real repairs from guesswork.
Completing Drive Cycles
Why does that check engine light sometimes stay off for days, then pop back on like it never left? I’ve seen this frustrate too many fellow DIYers who thought they’d fixed the problem. Here’s what’s really happening: your ECU needs time to relearn, and those readiness monitors haven’t finished their homework yet.
A proper drive cycle starts cold, warms up fully, then mixes highway cruising with stop-and-go traffic to exercise every system. I run 3 to 5 complete cycles, watching my OBD-II scanner as catalyst monitoring, oxygen sensor tests, and MAF sensor checks flip from pending to ready.
Skip this step, and your emissions systems never get fully validated. Clear codes only after repairs are solid, then drive until all monitors pass. No shortcuts, no surprises.
What Happens When You Ignore the Light for Too Long
I’ll let that light sit for weeks, and I’ve watched a $200 oxygen sensor turn into a $1,500 catalytic converter replacement. The damage doesn’t stay put; it spreads through your ignition system, fuel injectors, and eventually your transmission like rust through sheet metal.
Here’s what actually happens when you play chicken with your check engine light, and why the repair bill multiplies faster than you’d think.
Recommended Products

✅【Vehicle Fitment 】Oxygen sensor fir for Honda Odyssey 2007 2008 2009 2010 3.5L V6.Replacement part matches factory specs perfectly —Plug-and-play installation for fast, hassle-free replacement.

One Year Unlimited Mileage Quality Guarantee

【Automotive OBDII Scanner】The obd2 scanner gets the complete 10 modes of OBDII test to retrieve car fault codes, view freeze frame data to determine the cause of certain problems, eads and clears check engine lights, turn off MIL and check vehicle emission-related monitors such as O2 Sensors, EVAP system etc.
Progressive Damage Risks
When you ignore that glowing check engine light, you’re not just postponing a repair. You’re inviting progressive damage that compounds with every mile.
I’ve seen it repeatedly in my diagnostics work. A simple misfires issue that costs little today can roast your catalytic converter tomorrow, turning a $200 fix into a $1,500 replacement. Your OBD-II system logs these problems in real-time.
Here’s what you’re risking:
- Catalytic converter failure from unburned fuel burning raw downstream
- Accelerated engine wear from running lean or rich mixtures
- Failed inspections from untreated emissions faults that void warranties
Staying on top of maintenance isn’t just smart. It’s your ticket to reliable performance. We’re all trying to keep our vehicles running strong without surprise breakdowns. Trust me, that little light deserves your attention now.
Cost Escalation Factors
That glowing light on your dash isn’t just a suggestion, it’s a countdown timer for your wallet. When I delay diagnostics, I’m not saving money, I’m inviting cost escalation that compounds fast.
I’ve seen how ignoring the check engine light turns simple fixes into nightmares. A loose gas cap becomes a fried catalytic converter. Faulty sensors trigger rich fuel mixtures, dumping unburned fuel that melts emissions control components.
Suddenly, I’m facing thousand-dollar repairs instead of hundred-dollar maintenance. The root cause never fixes itself. My procrastination risks failed inspections, pollution penalties, and voided protection plans.
Timely diagnostics spot problems while they’re small. I prevent costly repairs by addressing issues early, extending my vehicle’s lifespan and keeping my daily driver reliable. Don’t let that light drain your savings, act now.
Find a Mechanic Who Diagnoses, Not Just Swaps Parts
How exactly do I separate the professionals from the parts-changers? I’ve learned that when my check engine light comes on, I need someone who reads diagnostic codes with an OBD-II scanner and follows precise diagnostics, not guesswork.
Here’s what I look for in a shop that treats me like I belong:
They explain the codes, like P0300 misfires or P0420 catalytic issues, and walk me through their exact diagnostic steps before touching anything.
They perform subsystems testing on my spark/ignition system, oxygen sensors, coils, and fuel trim, confirming failures rather than swapping parts hoping for a fix.
They provide transparent reports with drive-cycle validation, tying every repair recommendation directly to identified codes.
This approach saves me money, time, and the frustration of return visits.
Recommended Products

[Built-in Air Pump]: Smoke machine features a built-in air pump, eliminating the need for an external air source, allowing you to perform tests anytime, anywhere. Simply add about 20ml of baby oil or Glycerin (oil not included) to start your testing effortlessly

HIGH PERFORMANCE, PREMIUM BUILD: Made in the USA. Solid Thick Metal Construction for durability. Equipped with our brand new AutoLine Pro Ceramic Smoke Coil and Top Rated Smoke Fluid that outputs LOTS OF SMOKE and last a Lifetime.

HyperSmoke Technology – Creates Thick Visible Smoke for Easy Leak Testing. Adjustable Pressure. Infinite Smoke. Instant Warmup. Built-In Air Compressor Motor. OEM Approved Smoke Fluid. Designed and Engineered by AutoLine Pro USA, an American Team of Individuals bringing the latest innovation to you.