Necessity is the mother of invention, and nothing proves it faster than squeezing your brake lever only to meet spongy resistance halfway to the grip. I’ve tested this five-step method across rim brakes, mechanical discs, and hydraulic setups, finding the barrel adjuster trick alone solves 80% of tension problems in under two minutes.
The real revelation comes at the caliper anchor, where 6-8 Nm of torque transforms a wandering cable into immediate bite. But here’s what most guides miss: even perfect tension fails if your wheel sits crooked in the dropout.
Tighten Your Brakes With the Barrel Adjuster
Why do so many riders ignore the simplest fix for mushy brakes? I’ll show you how to adjust bike, starting with the barrel adjuster, that knurled dial where cable housing meets brake lever or caliper.
First, wind your barrel adjuster all the way in clockwise, then back it out one full turn. This sets your baseline for brake cable tension.
Pull the inner cable taut through the caliper arm, complete your end bolt tightening, then release the barrel adjuster counterclockwise to add tension. You’ll feel brake lever feel transform from spongy to responsive.
Test ride immediately. Small quarter-turn adjustments give you noticeable braking power gains without over-tightening. Once satisfied, lock the barrel adjuster with its ring clockwise. You’re back in control, no shop visit needed.
Recommended Products

It's made of high quality of Aluminium Alloy which is durable and strong
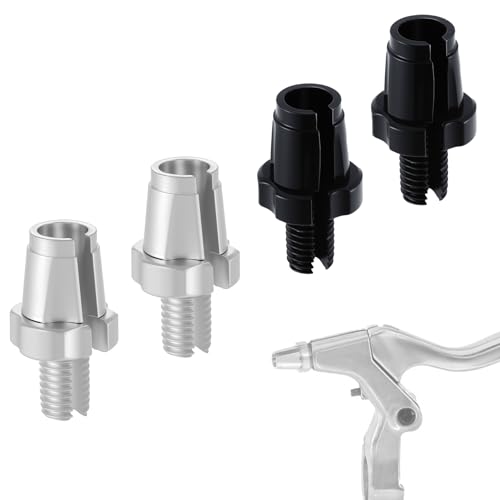
Precise Control: Our bicycle brake lever adjustment screws allow for precise adjustment of the brake handle and inner brake cable, ensuring effective braking performance for safer riding

𝐏𝐮𝐫𝐩𝐨𝐬𝐞: M7 brake lever adjuster is used to replace the brake lever tube-shaped adjuster, which can adjust the brake handlebar and the inner brake line of the bicycle brake lever, ensuring precise and effective control of braking performance
Still Loose? Tighten the Cable at the Brake Caliper
How do you know when the barrel adjuster has reached its limit? When it won’t turn anymore, or the lever feel stays spongy despite full clockwise rotation, you’ve maxed it out. That’s your signal to address the brake cable directly at the source.
I loosen the anchor bolt on the brake caliper, grip the cable housing firmly, and pull the inner wire taut with steady pressure. This removes slack and restores cable tension where it matters most. Then I tighten the bolt firmly, around 6-8 Nm, to lock everything in place.
The transformation is immediate. Braking power returns with crisp authority, and the lever feel becomes responsive and predictable. I squeeze the lever hard, confirming the pads bite quickly without excessive travel. If it still feels off, I recheck housing length and re-seat any compressed sections.
Recommended Products

Universal Set: Fits either mountain bikes or road bikes

Commonly referred to as a “4th Hand”, the Park Tool Cable Stretcher pulls cables tight.

Hozan 4th Hand and Cable Puller
Center Your Brake Pads on the Rim
The final step in dialing in your brakes is getting those brake pads centered on the rim. I start by eyeballing both pads against the rim braking surface, checking they sit at equal distances from the rim edge. This prevents uneven wear and that annoying rubbing sound.
For centering, I use the barrel adjuster for quick tweaks, then fine-tune with the side screws on each brake arm. These move the pads inward or outward until they align perfectly. If one pad bites first, I loosen the mounting bolt slightly, reposition, and retighten securely.
After adjustments, I perform a wheel rotation test. Both pads should contact simultaneously without touching the tire.
I recheck centering after any truing or frame adjustments, maintaining consistent clearance across the entire braking surface.
Check Your Wheel Is Tight and Straight
Where’s your wheel sitting right now? If it’s crooked, your brake adjustment won’t matter. I always start every true wheel check by loosening the quick-release, then centering the wheel between the brake pads before retightening firmly.
Here’s my three-step process for solid wheel alignment:
- Loosen the quick-release, center the wheel in the dropouts, then clamp down tight
- Spin the wheel and verify rim clearance stays even on both sides
- Sight from the side, checking that gaps between brake pads and rim match left and right
If the wheel sits crooked, shift it laterally until even, then re-tighten. After any brake adjustment, I re-check wheel truing. Your wheel must stay centered under braking. Get this right, and you’re part of the crew that rides with confidence.
Recommended Products

Universal Compatibility: Designed to fit most side-pull, cantilever, and center-pull brake calipers, these anchor bolts
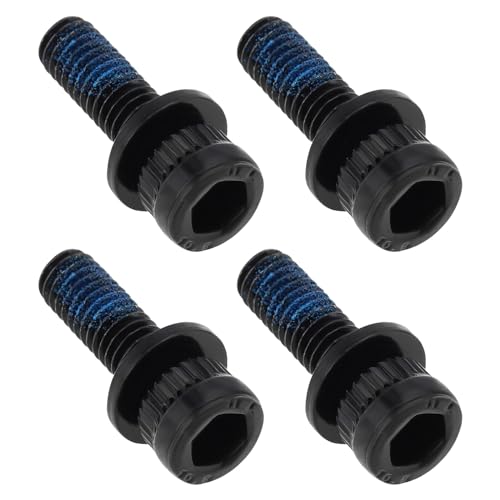
Material: High carbon steel bicycle caliper screws have remarkable capabilities in corrosion prevention, antioxidation and excellent durability.

Stainless steel bracket mounting bolts for flat mount caliper
Test Your Brakes Before Riding
Since I’ve already aligned the wheel and adjusted the cable tension, I now spin the wheel to confirm the pads kiss the rim without rubbing, then squeeze the lever to feel how quickly the brakes bite. If I notice pad rubbing or weak lever engagement, I’ll fine-tune the barrel adjuster on the lever to dial in brake tension precisely.
With the wheel centered and brake tension set, I check that both brake pads clear the rim equally on each side. Uneven clearance means uneven stopping power, so I don’t skip this step.
Finally, I perform a quick ride test in a safe, flat area. I accelerate to 10-15 mph, then brake firmly. If the response feels mushy or delayed, I return to the barrel adjuster and repeat until the bite feels sharp and immediate.
Recommended Products

Best used with lined or nosed end caps

Brake System: Mechanical Disc Brake System with 2 x 160mm Rotor, 1 x Front Brake Caliper; 1x Rear Brake Caliper, 1x Brake Cable Kit, 1x Disc Rotor Adjuster, 4x Cable End Tips, 2x Rotating S-Hook Clips and 12 X Disc Brake Rotor Screws

UNIVERSAL BIKE COMPONENTS & PARTS - M10 bike brake handle adjustment screws fit most road bikes, mountain bikes, and other bicycle types, ensuring versatile use.