Need to measure a bolt pattern on your rim but don’t know where to start? This crucial measurement ensures you’re purchasing the right wheels for your vehicle—getting it wrong could mean wasted money and frustrating returns.
Determining your rim’s bolt pattern might seem technical, but it’s actually quite straightforward with the right approach. Whether you’re upgrading your wheels or replacing a damaged rim, knowing how to accurately measure this specification will save you time and prevent costly mistakes. In this guide, we’ll walk you through simple step-by-step methods to identify your bolt pattern correctly.
What Is a Bolt Pattern on a Rim?
A bolt pattern refers to the exact arrangement of lug holes on your vehicle’s wheel rim. These holes match up with the studs on your vehicle’s hub assembly, allowing you to secure the wheel to your car. Each bolt pattern consists of two critical measurements: the number of bolt holes and the diameter of the circle they form.
Bolt patterns vary significantly across different vehicle makes and models. For example, many Honda vehicles use a 5×114.3mm pattern, while certain BMW models feature a 5x120mm configuration. This variation exists because manufacturers design wheel mounting systems based on vehicle weight, performance requirements, and traditional specifications for their brand.
Understanding your rim’s bolt pattern is essential when purchasing new wheels. Matching the correct bolt pattern ensures proper fitment, prevents safety issues, and eliminates unnecessary returns. Mismatched bolt patterns won’t allow wheels to mount correctly on your vehicle, regardless of other compatible specifications like rim diameter or width.
Most passenger vehicles typically use 4, 5, 6, or 8 lug bolt patterns. Smaller cars often use 4 or 5 lug configurations, while trucks and larger SUVs commonly feature 6 or 8 lug designs for additional strength. Performance vehicles might use 5 lug patterns with exact diameter measurements optimized for their particular handling characteristics.
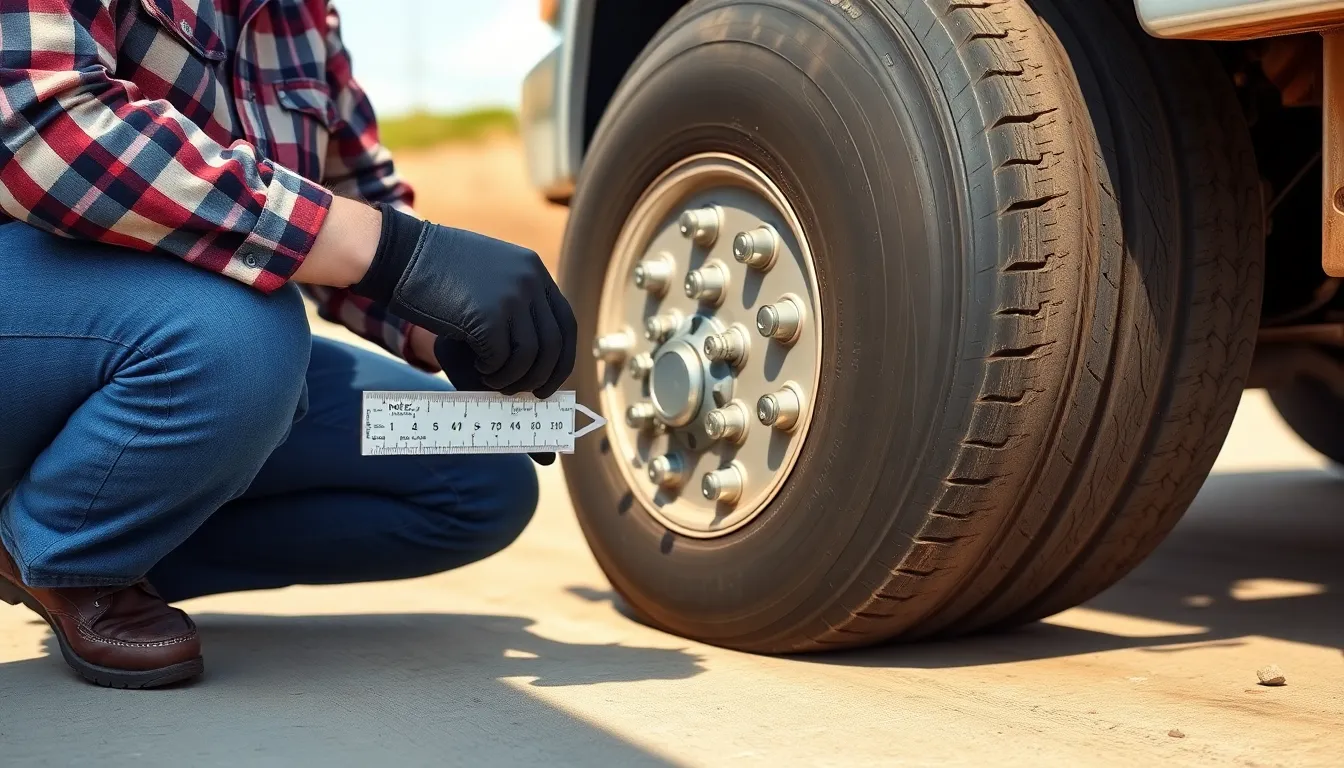
Tools Needed to Measure Bolt Patterns
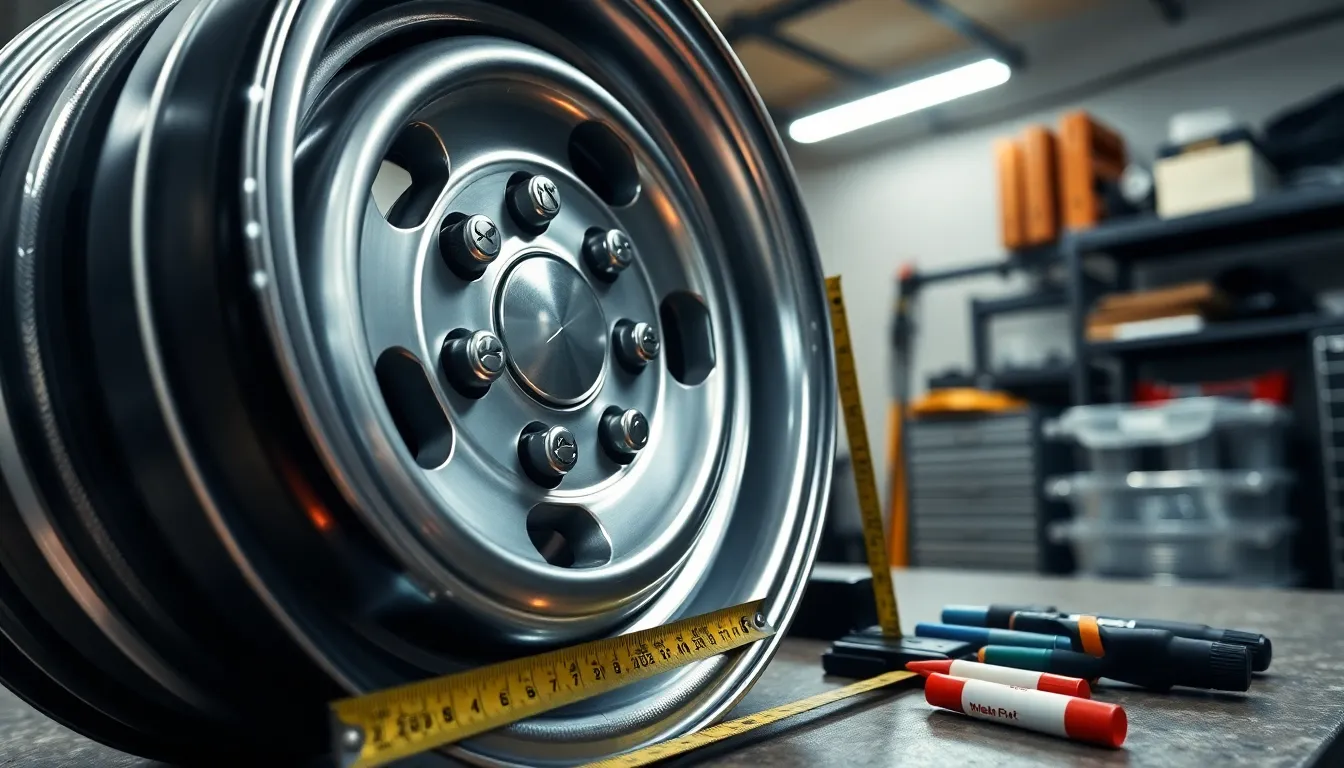
Accurate bolt pattern measurements require just a few basic tools you likely already have at home. A ruler or measuring tape is essential, preferably one that displays both millimeters and inches for precise readings. Many automotive specifications list bolt patterns in both measurement systems, so having access to both helps avoid conversion errors.
Markers come in handy for temporarily identifying exact lug holes during the measurement process, especially when working with wheels that have multiple holes or complex patterns. These markings ensure you’re measuring between the correct points consistently.
For those who frequently work with wheels or want the most accurate results possible, specialized bolt pattern gauge tools exist that simplify the entire process. These purpose-built templates allow you to quickly determine bolt patterns without manual measurements. Though not required, these gauges eliminate much of the guesswork involved in measuring odd-numbered lug patterns like the common 5-lug configuration.
The right tools make the difference between a frustrating experience and a smooth wheel-fitting process. While professional mechanics might use sophisticated equipment, these three basic items are sufficient for most DIY enthusiasts to accurately determine their vehicle’s bolt pattern.
Understanding Bolt Pattern Notation
Bolt pattern notation uses a simple format that combines two critical measurements: the number of lug holes and the diameter of the circle they form. This notation appears as two numbers separated by an “x” (e.g., 5×4.5 or 4×100). The first number always indicates how many lug holes are present on the wheel, while the second number represents the diameter of the pitch circle diameter (PCD) that passes through the centers of these holes.
For example, a “5×4.5” bolt pattern indicates a wheel with 5 lug holes arranged on a circle with a 4.5-inch diameter. Similarly, a “4x100mm” pattern means 4 lug holes positioned on a 100mm diameter circle. These measurements are essential for ensuring your new wheels fit correctly on your vehicle’s hub assembly.
Regional differences exist in how bolt patterns are expressed. American manufacturers typically use inches (5×4.5″), while European and Japanese manufacturers prefer millimeters (5×114.3mm). It’s worth noting that 5×4.5″ and 5×114.3mm are equivalent measurements, just expressed in different units.
Converting between units is straightforward if you need to compare patterns listed in different measurement systems:
- To convert inches to millimeters: multiply by 25.4
- To convert millimeters to inches: divide by 25.4
Understanding bolt pattern notation correctly ensures you’ll purchase compatible wheels for your vehicle, avoiding unnecessary returns and potential safety issues.
How to Measure 4-Lug Bolt Patterns
Measuring a 4-lug bolt pattern is straightforward because the lug holes are positioned directly opposite each other. You’ve got two reliable methods to determine this crucial measurement accurately.
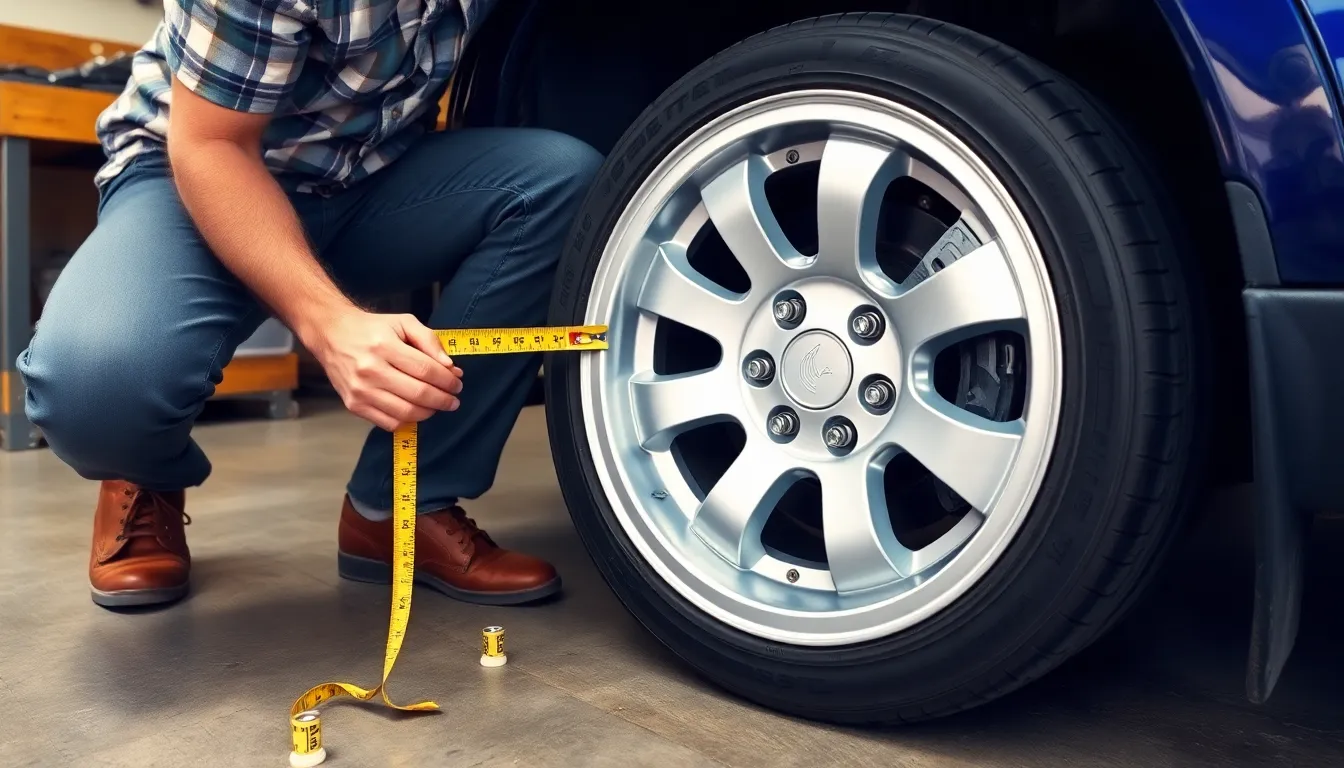
Using the Center-to-Center Method
The center-to-center method provides a direct way to measure your 4-lug bolt pattern without specialized tools. First, locate two lug holes that sit directly across from each other on your rim. Next, measure the distance from the center of one lug hole to the center of the opposite hole using a ruler or caliper for precision. This measurement represents the bolt circle diameter (BCD) – the imaginary circle that passes through the center of all lug holes. Your bolt pattern is expressed as “4-[measurement]” where the measurement is typically in millimeters or inches. For example, if you measure 100mm across opposite holes, your bolt pattern is 4-100mm.
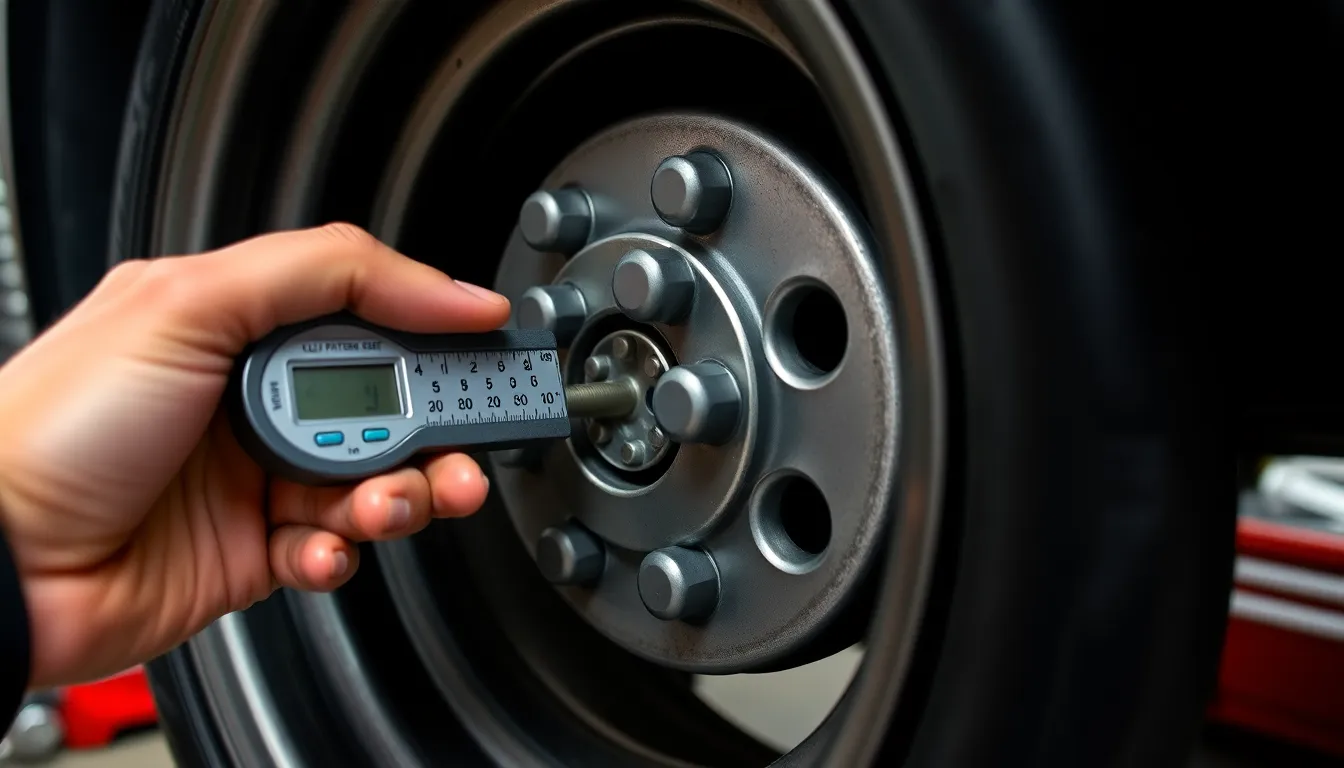
Using a Bolt Pattern Gauge
A bolt pattern gauge eliminates guesswork and increases accuracy when measuring lug patterns. These specialized tools are designed specifically for determining bolt patterns quickly and with minimal effort. To use a bolt pattern gauge, simply place it on your rim so the gauge’s pins engage with the lug holes. The gauge directly indicates the bolt circle diameter without requiring manual measurements or calculations. Bolt pattern gauges are particularly helpful for identifying common patterns found on various vehicles and can save important time compared to manual measuring methods. Many automotive enthusiasts find these gauges worth the investment, especially when working with multiple vehicles or frequently changing wheels.
How to Measure 5-Lug Bolt Patterns

Five-lug bolt patterns require exact measuring techniques due to their arrangement. Unlike 4-lug patterns, 5-lug patterns can’t be measured with a simple straight-across method. Let’s explore the two most effective ways to determine your 5-lug bolt pattern.
Using the Star Pattern Method
The star pattern method offers a reliable approach for measuring 5-lug bolt patterns without specialized tools. First, identify and confirm that you’re working with a 5-lug wheel. Instead of measuring adjacent lug holes, measure from the center of one lug hole to the center of the lug hole that’s two positions away (skipping one hole in between). This measurement gives you the diameter of the imaginary circle passing through all lug centers. Your bolt pattern is expressed as “5 on X” where X represents the diameter in inches or millimeters – for example, “5 on 4.5” indicates five lugs positioned on a 4.5-inch circle. This method works because the measurement across non-adjacent holes in a 5-lug pattern correlates directly to the bolt circle diameter.
Using a Bolt Pattern Tool
Bolt pattern gauges eliminate guesswork and provide precise measurements for 5-lug wheels. These specialized templates fit over your wheel’s lug holes to quickly identify the exact bolt pattern. Place the tool over the wheel, aligning it with the lug holes until you find a perfect match with the standard bolt patterns marked on the tool. Companies like Speedway Motors offer bolt pattern gauges specifically designed for measuring various wheel configurations. These tools prove especially valuable if you frequently work with different wheels or need to verify measurements without complex calculations. When using a bolt pattern tool, remember to check for additional fitment factors like backspacing or wheel offset, measured from the wheel’s inside lip to the mounting surface, to ensure complete compatibility with your vehicle.
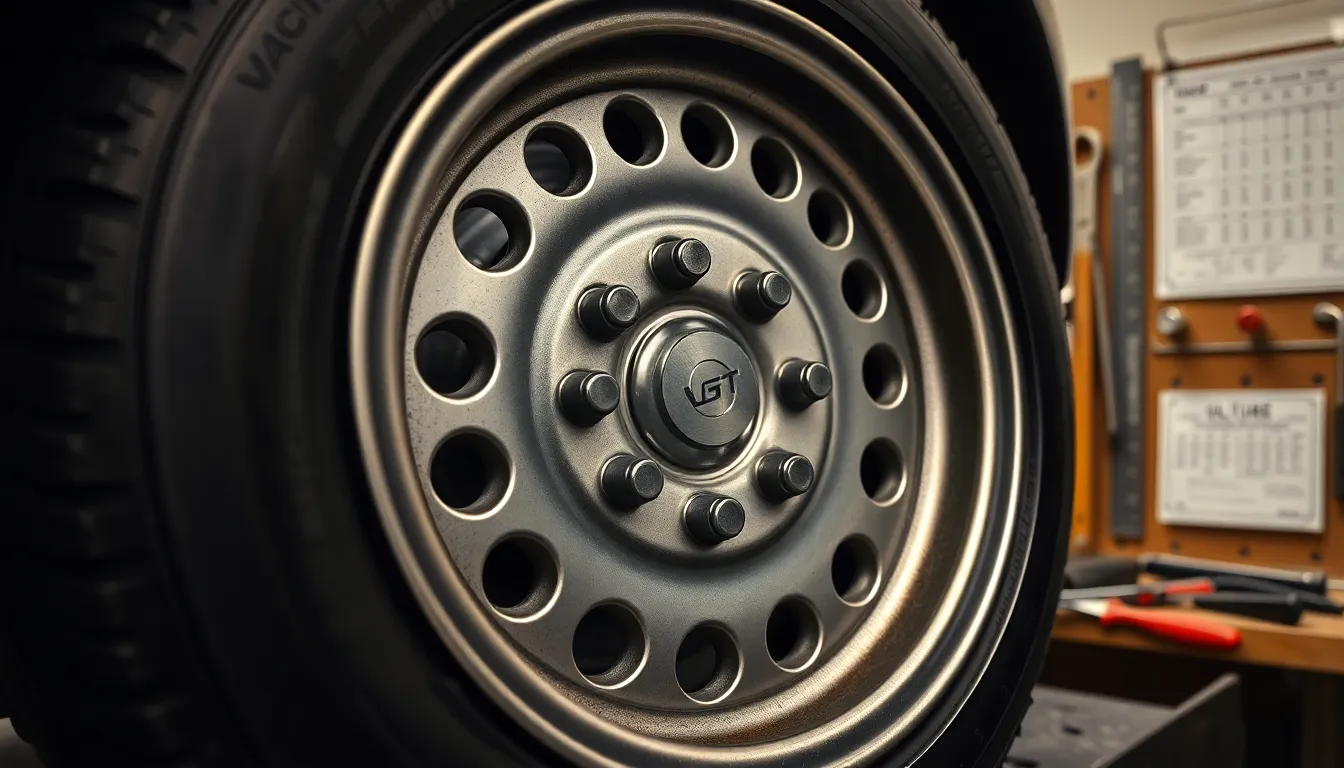
How to Measure 6-Lug and 8-Lug Patterns
Measuring 6-lug and 8-lug patterns follows a straightforward center-to-center method that’s more direct than measuring 5-lug wheels. These larger bolt patterns are commonly found on trucks, SUVs, and heavy-duty vehicles where additional strength is required.
Step-by-Step Measurement Process
- Count the lug holes on your wheel to confirm you have a 6-lug or 8-lug pattern.
- Position your wheel on a flat surface with the lug holes facing up for easier access.
- Locate two directly opposite lug holes across the wheel from each other. Unlike 5-lug patterns, 6-lug and 8-lug wheels have perfectly opposing holes.
- Measure the distance from the center of one lug hole straight across to the center of the opposite lug hole. This measurement gives you the bolt circle diameter.
- Record your measurement in both millimeters and inches if possible. For example, a common 6-lug pattern is 6×139.7mm (which equals 6×5.5″).
Using a Bolt Pattern Gauge
A bolt pattern gauge simplifies the measurement process for 6-lug and 8-lug wheels:
- Place the gauge over the wheel’s lug holes.
- Align the gauge pins with the lug holes until they fit perfectly.
- Read the measurement directly from the gauge, which eliminates any potential for human error.
- Convert measurements if necessary, remembering that 25.4mm equals 1 inch.
Common 6-Lug and 8-Lug Patterns
| Vehicle Type | Common 6-Lug Patterns | Common 8-Lug Patterns |
|---|---|---|
| Pickup Trucks | 6x135mm, 6×139.7mm | 8×165.1mm, 8x170mm |
| SUVs | 6×139.7mm, 6x132mm | 8×165.1mm, 8x180mm |
| Heavy-Duty Vehicles | 6×139.7mm, 6x170mm | 8x200mm, 8x210mm |
The measurement accuracy for these larger bolt patterns is critical, as even small errors can create fitment issues. Many truck owners discover this when upgrading to aftermarket wheels, where a difference of just a few millimeters can prevent proper installation.
Remember to check manufacturer specifications for your exact vehicle to confirm your measurements, as bolt patterns can vary between different models and years from the same manufacturer.
Common Bolt Pattern Sizes for Popular Vehicles
Popular vehicle manufacturers use standardized bolt patterns across their vehicle lines. Compact cars typically feature a 4×100 mm bolt pattern, making wheel compatibility easier within this vehicle segment. Many trucks and SUVs come equipped with a 5×4.5 inches (114.3 mm) bolt pattern, which has become an industry standard for these larger vehicles.
European manufacturers and certain GM vehicles often use a 5×120 mm bolt pattern, creating a distinct wheel fitment requirement for these brands. Larger trucks and SUVs frequently employ a 6×139.7 mm (6×5.5 inches) bolt pattern to support heavier loads and provide additional strength where needed.
These measurements vary significantly between vehicle classes:
| Vehicle Type | Common Bolt Pattern | Examples |
|---|---|---|
| Compact Cars | 4×100 mm | Honda Civic, Toyota Corolla |
| Midsize Cars | 5×114.3 mm (5×4.5″) | Honda Accord, Nissan Altima |
| European Cars | 5×120 mm | BMW 3-Series, Volkswagen Golf |
| Light Trucks | 6×139.7 mm (6×5.5″) | Ford F-150, Chevy Silverado |
| Heavy Duty Trucks | 8×165.1 mm (8×6.5″) | Ford F-250, GMC Sierra 2500 |
Always check your exact vehicle’s specifications since bolt patterns can differ between trim levels and model years. Manufacturer variations exist even within similar vehicle classes, so verifying measurements using the techniques described earlier ensures proper wheel fitment and avoids costly returns.
Accurate bolt pattern identification helps match aftermarket wheels to your vehicle correctly, ensuring both safety and optimal performance. Remember that backspacing and offset measurements also play crucial roles in proper wheel fitment, particularly when considering wider or differently sized aftermarket options.
Potential Mistakes to Avoid When Measuring
Measuring from center-to-edge instead of center-to-center creates important inaccuracies in your bolt pattern measurements. Always place your measuring tool at the center points of each lug hole rather than their edges to ensure precise readings. This common error can lead to wheels that simply won’t fit your vehicle.
Using the wrong holes for odd lug counts frequently confuses DIY mechanics. With a 5-lug pattern, don’t attempt to measure across directly opposite holes (which don’t exist); instead, measure from one lug hole to another that’s two positions away, skipping one hole in between. This technique provides the correct bolt circle diameter for odd-numbered patterns.
Mixing measurement units causes countless fitment problems. Some manufacturers specify bolt patterns in millimeters (like 5×114.3) while others use inches (5×4.5), so maintain consistency in your measurements to avoid confusion. Many quality measuring tools include both metric and imperial scales to eliminate conversion errors.
Imprecise measuring tools compromise your entire wheel-fitting process. Use a caliper or accurate ruler rather than estimating measurements by eye. Even a few millimeters of discrepancy can render a wheel unusable for your exact vehicle and waste hundreds of dollars on incompatible parts.
Ignoring manufacturer specifications costs buyers time and money. While measuring yourself provides valuable information, always cross-reference your findings with your vehicle’s owner manual or manufacturer documentation whenever possible. Vehicle-exact databases often contain the exact bolt pattern information for your make, model, and year.
Conclusion
Measuring your rim’s bolt pattern correctly is a simple skill that pays off immediately. With just a ruler or tape measure and the right technique for your lug count you’ll avoid the headache of purchasing incompatible wheels.
Remember to measure center-to-center always use consistent units and double-check your measurements against manufacturer specifications when possible. For ultimate precision consider investing in a bolt pattern gauge.
Taking these few minutes to properly identify your bolt pattern saves you time money and frustration in the long run. Now you’re equipped with the knowledge to confidently upgrade your wheels or replace a damaged rim without second-guessing your measurements.
Frequently Asked Questions
What is a bolt pattern and why is it important?
A bolt pattern is the arrangement of lug holes on a wheel rim that aligns with the studs on the hub assembly. It consists of two measurements: the number of bolt holes and the diameter of their circle. Knowing your vehicle’s correct bolt pattern is crucial for proper wheel fitment, preventing safety issues, and avoiding unnecessary returns when purchasing new wheels.
How is bolt pattern typically notated?
Bolt pattern notation combines the number of lug holes and the circle diameter, written as two numbers separated by an “x” (e.g., 5×4.5 or 4×100). American manufacturers typically use inches while European and Japanese manufacturers use millimeters. For example, 5×4.5″ and 5×114.3mm are equivalent measurements.
What tools do I need to measure a bolt pattern?
You’ll need a ruler or measuring tape (preferably one showing both millimeters and inches), markers for identifying lug holes, and optionally, a specialized bolt pattern gauge for greater accuracy. These basic tools are sufficient for most DIY enthusiasts to determine their vehicle’s bolt pattern effectively.
How do I measure a 4-lug bolt pattern?
For a 4-lug pattern, use the center-to-center method: measure the distance between two lug holes directly opposite each other to determine the bolt circle diameter (BCD). Alternatively, use a bolt pattern gauge for increased accuracy, as it directly indicates the bolt circle diameter without manual calculations.
What’s the best way to measure a 5-lug bolt pattern?
For 5-lug wheels, use the star pattern method: measure from the center of one lug hole to the edge of the second hole over (not adjacent). Multiply this measurement by 1.051 for the bolt circle diameter. A bolt pattern gauge can also provide direct measurements without calculations for increased accuracy.
How do I measure 6-lug and 8-lug patterns?
For 6-lug and 8-lug patterns, use the center-to-center method by measuring the distance between two directly opposite lug holes. These patterns are common on trucks and SUVs. The measurement gives you the bolt circle diameter directly, making it simpler than measuring 5-lug patterns.
What are common bolt patterns for popular vehicles?
Compact cars typically use 4x100mm patterns, while many trucks and SUVs use 5×114.3mm (5×4.5″). European manufacturers and certain GM vehicles often utilize 5x120mm patterns, and larger trucks frequently employ 6×139.7mm (6×5.5″) patterns. Always check manufacturer specifications as patterns can vary between trim levels and model years.
What mistakes should I avoid when measuring bolt patterns?
Avoid measuring from center-to-edge instead of center-to-center. For odd lug counts, measure from one lug hole to another that skips one hole in between. Maintain consistency in measurement units (inches or millimeters), use precise measuring tools, and cross-reference your findings with manufacturer specifications to ensure accuracy.
Do all vehicles from the same manufacturer use the same bolt pattern?
No, bolt patterns can vary significantly even within the same manufacturer’s lineup. Different models, trim levels, and production years may use different bolt patterns. Always verify the exact specifications for your particular vehicle rather than assuming based on the manufacturer alone.
Besides bolt pattern, what other measurements are important for wheel fitment?
While bolt pattern is crucial, backspacing and offset measurements are equally important for proper wheel fitment, especially with wider or differently sized wheels. These measurements determine how the wheel sits in relation to the suspension components and fender, affecting both performance and appearance.