
I’ve jump-started dozens of batteries across three continents, and I’ll tell you straight: most people get the sequence wrong and risk frying their electronics. The difference between a 10-minute fix and a $400 repair bill comes down to clamp placement, cable gauge, and knowing when your battery’s too far gone to save.
I’ve tested everything from budget 6-gauge sets that melt in cold weather to professional 2-gauge leads that cost triple but start a diesel in subzero temps. Here’s what actually matters.
Gather Your Jump-Starting Equipment
Why risk getting stranded with dead hardware when a few smart picks make all the difference? I’ve learned that gathering the right gear separates a quick fix from a roadside headache.
The right gear separates a quick fix from a roadside headache.
You’ll need a standard 12V car battery, a second vehicle with full charge, and quality jump leads. Skip hybrids or electrics; they won’t give you the punch you need. I always buy jump leads from reputable sources like the RAC shop. Cheap cables fray, overheat, or fail when you’re counting on them.
Check your owner’s manual first. Both vehicles must run 12V systems. Inspect your jump leads for cracked insulation or exposed wire. Look at both batteries for leaks, bulges, or corrosion.
Before touching anything, I remove my watch and rings. Metal near terminals causes shorts. Simple preparation keeps you safe and gets you moving.
Recommended Products

HIGH-PERFORMANCE JUMP STARTING - The car jumper starter portable pack has a 45C high-rate lithium battery that can start 6.0 L gas/3.0 L diesel engines and other 12 V vehicles like motorcycles, cars, SUVs, pickups, or lawnmowers.This jump starter's powerful 1500 A peak suit current quickly starts low-voltage and fully-drained batteries, And suitable as a Father's Day gift for your dad.

【Powerful Battery Starter】The OXILAM car jump starter delivers a powerful peak current of 6000A, capable of quickly reviving a dead car battery in just seconds—even in extreme temperatures. A single full charge provides up to 60 jumpstarts. 2024 upgraded jumper cables can safely start all gas engines and 12L diesel engines, including 12v vehicles, motorcycles, pickups, RVs, tractors, trucks, vans, ATVs, snowmobiles, yachts, and many more. Say goodbye to being stranded due to a dead battery

POWERFUL CAR BATTERY JUMP STARTER: The ET03 car battery jump starter can easily jump-start all 12V common vehicles with up to 8.0L gas and 7.0L diesel engines in seconds with its peak current reaching 4000 amps. Supports 50 jump starts at most on a single charge and suitable for lawnmowers, motorcycles, passenger cars, trucks, and even boats, etc.
Position Both Vehicles Safely
Once I’ve got my gear sorted, I move straight into positioning. I park the donor vehicle within two feet of my dead car, close enough for the cables to reach but never letting the vehicles touch. I make sure both engines are off, and I position us away from traffic where we won’t get clipped by passing cars.
I pop both bonnets and check that I can clearly see the battery terminals on each vehicle. Before I start any jumpstart attempt, I verify both cars run 12V systems and confirm the donor battery is fully charged. This prevents damage and ensures the transfer actually works.
- Two feet of separation, engines silent, vehicles never touching
- Batteries exposed, terminals visible, cables within easy reach
- Bystanders standing back, traffic flowing past at safe distance
I double-check my surroundings, keeping everyone clear of moving parts and hot surfaces.
Recommended Products

20 FT JUMPER CABLES - These battery jumper cables are 20 feet long and easily connect from one car battery to another without tangling.

Package include: 6pcs alligator clips electrical with 6 colors.Voltage: 1000V. Current: 15A.

【Upgraded Version】Allows higher current flow.The new Version connectors are optimized to deliver bigger power surges when needed.
Inspect Batteries and Leads for Damage
I always start by giving both batteries a thorough once-over for cracks, leaks, or swelling that could turn a simple jump start into a dangerous situation. You’ll want to check your jump leads too, looking closely for frayed wires or loose clamps that won’t grip properly under load. If I spot any damage, I’m not taking chances. I’m calling a pro instead of risking a short or battery explosion.
Recommended Products

20 FEET HEAVY DUTY JUMPER CABLES: 2 Gauge, 20 FT booster battery jumper cables, can withstand up to 800 Amp of instantaneous current. Ideal for 7.0 L gas and 5.0 L diesel engine. Suitable for 12V & 24V vehicles including trucks, SUVs, full-size cars, mid-size cars, and compact cars
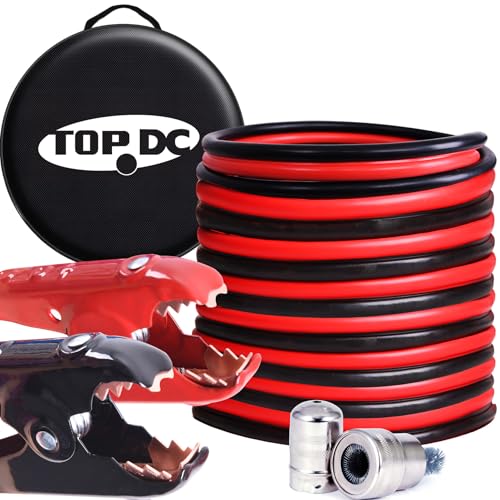
Strong And Safe Clamps: The TOPDC Jumper Cables booster cable has four giant alligator clamps with strong jagged teeth and springs for excellent grip force. The jaws are strong and make connections easy. And the High Peak Jumper Cables has insulating rubber material to prevent electric shock and protect the safety of users

【PREMIUM FLEXIBLE CABLE 】 NOONE jumper cables have excellent conductivity and power transmission and feature a thick vinyl coating. These booster cables can withstand up to 600Amp of instantaneous current and works well in extreme environments (-40℉~140℉)
Visual Damage Check
A thorough once-over of both batteries and jump leads saves you from headaches later. I always start by scanning for the obvious red flags that could turn a simple jump start into a roadside nightmare.
- Greenish-white crust on terminals, the telltale sign of corrosion eating away at your connection
- Frayed rubber insulation revealing copper strands underneath, like worn brake lines waiting to fail
- Bulging plastic cases or dark streaks of acid weeping from seams, warning you to step back
I check that clamps grip tight and no bare wires touch each other. Cracked cases or leaking batteries? I walk away, period. Clean terminals matter, so I brush off any buildup before connecting. Five minutes of inspection beats a fried electrical system, trust me.
Connection Integrity Verification
Visual damage only tells half the story, so you’ll want to verify that every connection can actually carry the load when needed. I always check that both batteries and jump leads are clean, secure, and corrosion-free before I start. Dirty or loose connections create resistance, heat, and failed starts.
I look for cracks, leaks, swelling, or exposed wires on the leads, and I confirm the clamps grip tightly without frayed insulation. I also make sure both vehicles share 12V systems; mismatched electrical setups risk serious damage.
If I spot battery leakage, smoke, or a cracked case, I stop immediately and call a professional. Solid connections mean reliable performance, and taking two minutes to verify everything now saves you from a dead battery later.
Connect Red Leads: Live Battery First, Then Dead
Where do you start when the engine won’t turn over? You grab those red cables and begin with the live battery, the one that still has juice. I clamp the positive lead to the donor battery’s positive terminal first, making sure it’s clean and tight. Then I stretch the cable across to your dead battery, connecting the other red clamp to its positive terminal.
Picture this:
- The red clamp biting firmly onto clean metal
- The cable arcing safely between two engines
- Both connections sitting secure, no wobble, no contact with stray metal
I double-check they’re not touching each other or any ground points. Keep that first connection steady while you work. Once both positives are locked in, you’re ready for the black lead, but that’s our next move together.
Recommended Products

【STURDY AND STRONG DURABILITY】 The jumper cable clamps are made of heavy-duty metal with good conductivity. The toothed jaws are integrated with the battery clamps themselves, eliminating the need to spend time installing the toothed fittings of the clamps. The one-piece design helps you make good contact and conductivity quickly. Jumper cable ends clamps come with insulated grips to avoid the risk of electric shock and do not hurt your hands.
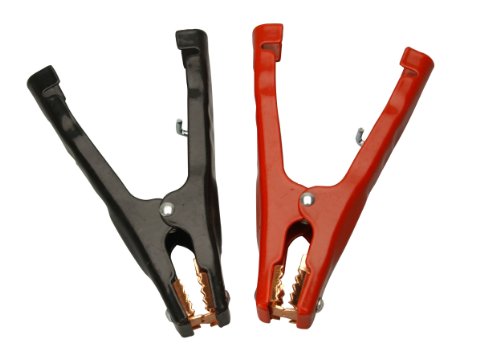
Strong & Secure Connection: The Southwire Replacement Jumper Clamps provide a heavy duty grip with vinyl coated steel construction for lasting durability and safe, reliable power transfer

Spray-painted iron body with pure copper jaws, all-inclusive material, the widest clip body is more stable
Attach Black Lead to an Earthing Point: Not the Battery
With both red clamps snapped firmly into place, I’m ready to ground the circuit safely.
I grab the black negative clamp and skip the dead battery’s terminal entirely. Instead, I’m hunting for a solid earth grounding point on the casualty vehicle. An unpainted engine block bolt or chassis ground works perfectly here. This earthing technique keeps sparks away from the battery, where hydrogen gas might linger.
I check that my chosen point is clean, corrosion-free, and offers bare metal contact. No painted surfaces will do. I route the cable clear of belts, fans, and hot exhaust components that could damage insulation or cause injury. The clamp bites down with satisfying resistance. This final connection completes the circuit without risking dangerous ignition near the battery case. We’re almost ready to transfer power.
Recommended Products

All-In-One - The ultimate battery terminal cleaning kit provides all the tools to clean and protect your battery from battery corrosion.

Quantity: comes with 10 pieces battery anti-corrosion washers(5 red & 5 green) and 2pcs Battery Terminal Cleaning Brush.

【WHAT YOU GET】: Included in the package are 2 battery terminal cleaning brushes and 10 battery terminal corrosion-resistant fiber washers (5 green and 5 red). We have thoughtfully designed different colors to help you distinguish between positive and negative, red for + and green for -.
Start the Working Car and Wait
You can finally bring things to life. I start the working car’s engine and let it idle, keeping the jump start procedure moving smoothly. The alternator begins pushing power through those cables, and I wait about two to three minutes. This gives the dead battery time to absorb enough charge for a reliable start.
I watch for warning signs during this charging window:
- Steam or unusual heat rising from either engine bay
- Any acrid smell of burning plastic or electrical components
- Strange clicking or grinding noises from either vehicle
If charging seems slow, I’ll apply moderate throttle, around 1,500 to 2,000 RPM, to boost alternator output. I avoid excessive revving; it strains the working car’s system without benefit. Patience here prevents headaches later.
Recommended Products
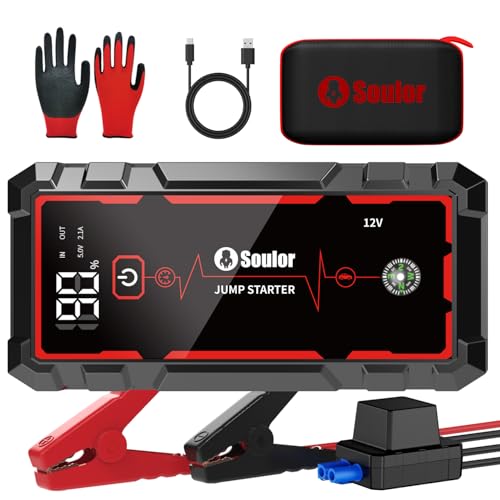
Dead Battery Jump Starting:It can jump-start 12V vehicles (cars, motorcycles, etc.) up to 40 times on a single full charge. Operates stably in extreme temperatures from -4°F to 140°F, ensuring consistent performance when you need it most. The built-in Forced Start function enables successful ignition even when the car battery is severely depleted, keeping you prepared for any roadside emergency.

HIGH-PERFORMANCE JUMP STARTING - The car jumper starter portable pack has a 45C high-rate lithium battery and 37WH capacity that can start 6.0 L gas/3.0 L diesel engines and other 12 V vehicles like motorcycles, cars, SUVs, pickups, or lawnmowers.This jump starter's powerful 1500 A peak suit current quickly starts low-voltage and fully-drained batteries, stocking stuffers for men and women.

Battery jumper cable designed to serve as a jump starter replacement cable clamp set ,Compatible with most car 12V jump portable starters, and mobile chargers to jump-start a dead or weak car battery.
Start the Dead Car: Or Troubleshoot Failures
Now comes the moment of truth. I turn the key in the dead car, and if I’m lucky, the engine catches. When my jump start works, I leave it running for five minutes, letting the battery soak up charge before I even think about shutting it off.
If nothing happens, I don’t panic. I wait two minutes, then try again, but I never crank longer than five seconds; that’s hard on the starter.
Still dead after round two? I’ve learned this means something deeper is wrong, maybe the alternator or a hidden electrical fault. Time to call for help.
Once I’m rolling, I watch for stalling. If the engine dies, I restart and drive thirty minutes minimum to rebuild that charge. Persistent failure means a battery test is my next stop.
Recommended Products

0 GAUGE QUICK CONNECT : The booster cable features quick connect plugs, the short end only needs to be installed once, and then there's no need to open the hood. Ready for immediate use, saving you rescue time

Heavy Duty 1/0 AWG Conductors with Extreme Flexibility: This Jumper cables built with 150 high‑density copper‑clad aluminum (CCA) strands for excellent conductivity and durability. The thick double‑layer PVC insulation stays flexible from -40°F to 140°F, so the cables remain easy to handle in scorching summer heat or freezing winter cold.
Remove Leads in Exact Reverse Order
I’ll remove the leads in the exact reverse order I connected them, starting with the ground clamp to prevent any dangerous sparks near the live battery. I always detach the negative lead from the donor vehicle next, which eliminates any chance of accidental contact with positive terminals.
Finally, I pull the red positive leads from both cars, keeping clamps separated and clear of metal surfaces before I restart or pack up.
Recommended Products

20 FEET JUMPER CABLES: This heavy duty jumper cables are 20 feet, easily connects to the car battery without tangling. Suitable for 12V/24V vehicles with 1.2L-3.0L displacement, including mid-size car, vans, large SUV, mini van, etc.

NOONE 16 FEET JUMPER CABLES : 2 Gauge, 16 feet booster battery jumper cables for jump starting dead or weak batteries. Ideal for trucks, SUVs, full-size cars, mid-size cars, and small/compact cars.

Powerful & Reliable – Constructed with 2 gauge wire for efficient energy transfer, ensuring a quick and safe jump-start in emergencies.
Safe Removal Sequence
Why risk a spark or short when a simple reversal keeps everything safe? I always disconnect the ground from the dead car first, working my way backward through the exact sequence I used to connect them. This method isolates the electrical flow before I handle any live components.
The black clamp falls away from the dead battery’s negative post, free and clear. The second black clamp releases from the donor car with a soft metallic click. The red clamps follow, one by one, like unclipping a seatbelt after a long drive.
I keep the clamps separated throughout, never letting them brush against each other or touch the engine block. Once free, I coil the cables away from hot manifolds and spinning belts. I inspect each clamp for corrosion before storing. With the engine running, I monitor the electrical system for warning lights during my first few miles.
Preventing Electrical Sparks
The ground clamp leaves the dead car first, then the donor’s negative, followed by both positives last. I keep both engines running during removal, which cuts down on arcing when the clamps separate.
I position my ground connection away from the battery and moving parts from the start, minimizing spark potential when I pull that first clamp. As I remove each lead, I visually check that no clamp brushes against metal, short circuits, or creates unwanted sparks.
After all four leads are off, I double-check that no clamps touch each other before coiling them for storage. This prevents inadvertent sparks later. Following this exact reverse sequence protects me, my car’s electronics, and gives me confidence I’ve done the job right.
Recharge Your Battery: Drive or Use a Charger
Once you’ve got your engine running again, what’s the smartest way to get that battery back to full strength? I’ve found two reliable paths that work for different situations.
If you’re mobile, drive for about 30 minutes. Your alternator pushes charge back into the battery while you handle errands or grab coffee. It’s convenient, though not as thorough as dedicated equipment.
For complete recovery, I prefer a quality battery charger. Connect it overnight, and you’ll restore full serviceability without engine wear.
A portable jump pack sits in your trunk, ready for solo rescues. Dashboard voltage readings climb steadily during proper charging. Clean terminals glow with that satisfying metallic sheen after maintenance.
Skip bump starting entirely. The RAC warns against it, and I’ve seen too many damaged components. Regular testing keeps your battery ready to accept that important recharge when you need it most.
Recommended Products

【Perfect Tools】 The set of Govel jumper cables replacement battery clamps are ideal for replacing, repairing a damaged pair of connectors on an existing jumper cable, or creating custom-length cables.

PATENTED ANTI-RUST CLAMPS – Fully insulated with rubber for safety. Resists corrosion and fits both top and side post batteries perfectly.

Multi-Purpose: Battery charger clamps are suitable for various battery charger projects with voltages of 12-24V, 2-6 AWG cable gauge, 1000A instantaneous current, 500A operating current, for voltage testers, boats, and other items that require charging
When to Skip DIY and Call Breakdown Services
I’ve handled dozens of jump starts over the years, but I’ve learned to recognize when it’s smarter to step back and phone for help. Jump start safety isn’t about pride; it’s about knowing your limits. If I’m not confident, or I spot a cracked or leaking battery, I don’t attempt anything. I call RAC at 0330 159 8743 instead. They provide instant breakdown cover, one-off emergency fees, and mobile mechanics who arrive prepared.
When my car won’t start after a proper jump, I stop retrying. Repeated attempts mask deeper battery or electrical faults that need professional diagnosis. I also skip bump-starting entirely; it’s risky and outdated.
If I’m unsure about battery condition or safety steps, I call before touching cables. Mobile battery testing and replacement beats guessing every time.
Recommended Products

Widely Used: 4 in 1 Car Battery Cleaning Brush can quickly wash steel parts, machinery, paint stains and will not damage the of the item. This tool is suitable for maintaining car batteries, marine batteries and other similar components and can be used for rust removal and painting. Rotates and rubs back and forth by screwing into the pile head to achieve cleaning purposes

【Effortlessly removes corrosion】The dual-ended battery post cleaning brush, made of stainless steel casing and with steel wire bristles, powerfully removes stubborn corrosion and oxides from battery terminals and clamps, ensuring optimal conductivity. In winter, clean terminals will help your car start more easily while reducing battery drain.

3-PIECE BATTERY MAINTENANCE SET: Includes 1 battery terminal pliers/terminal spreader tool and 2 battery terminal cleaning brushes to service battery posts and cable ends.